Tools (Drawing, Elevation Picker, Anim)
Drawing, Elevation Picker, Sun/Shadow Calculator, Animation, and the catalog searches that find new data
A grab bag of map-based utilities in the sidebar's Tools group, independent of whichever visualization modes are active. Source Info also lives in that group — it is documented with the coverage overlays it contains.
The last two sections below are not in the Tools group at all: they are the catalog searches, tabs inside the Add Terrain and Add Basemap dialogs. They are here because they are tools in every sense that matters — they are how you find data you do not already have a URL for.
Drawing
Sketch directly on the map — a TerraDraw-based sketch/measure layer for annotating or roughly measuring distances and areas over the terrain, independent of any export pipeline. Tools: Select, Point, Line, Polygon, Rectangle, and Circle (Esc cancels the active tool back to Select — see Keyboard Shortcuts).
- Named layers — multiple layers, each with its own visibility toggle, style, and zoom-to-bounds button; a layer's contents can be imported from a GeoJSON, KML, GPX or FlatGeobuf file, or, from the chevron next to Import, from a URL (those formats plus a Shapefile, whose
.dbf/.prjare fetched alongside), and exported back out. Only the geometry and attributes are loaded: any styling the file carries is ignored, features take the colours of the layer they land in. - Remote layers in a link —
?drawingUrl=https://host/features.geojson(repeatable) loads remote vector data at startup, one layer per URL, and frames it unless the link carries its own camera. Such a layer is re-fetched on every load rather than stored, so the link always shows the current data, while its name and colours are remembered. - Persistence — drawn/imported layers are kept for the session by default; turn on Settings → Browser Local Storage Persistence → Vector Layers to have them survive reloads (OPFS-backed, with a storage-usage readout and Clear button).
- Batch-export targets — in Historical mode, drawn features are the per-feature targets of the Export Multi (Historical) GeoTIFF batch dialog.
Feature Iterator
The loop toggle on a layer row steps through that layer's features one at a time, auto-framing each on the map: lines/polygons get fit to the viewport with a 20% margin, points are centered at a fixed zoom of your choosing (or the current zoom). The index wraps in both directions, clicking a feature of the iterated layer on the map jumps the iterator to it, and →/N, ←, and D/Delete step or delete without touching the panel (full list under Keyboard Shortcuts) — handy for reviewing an imported inventory of sites one by one.
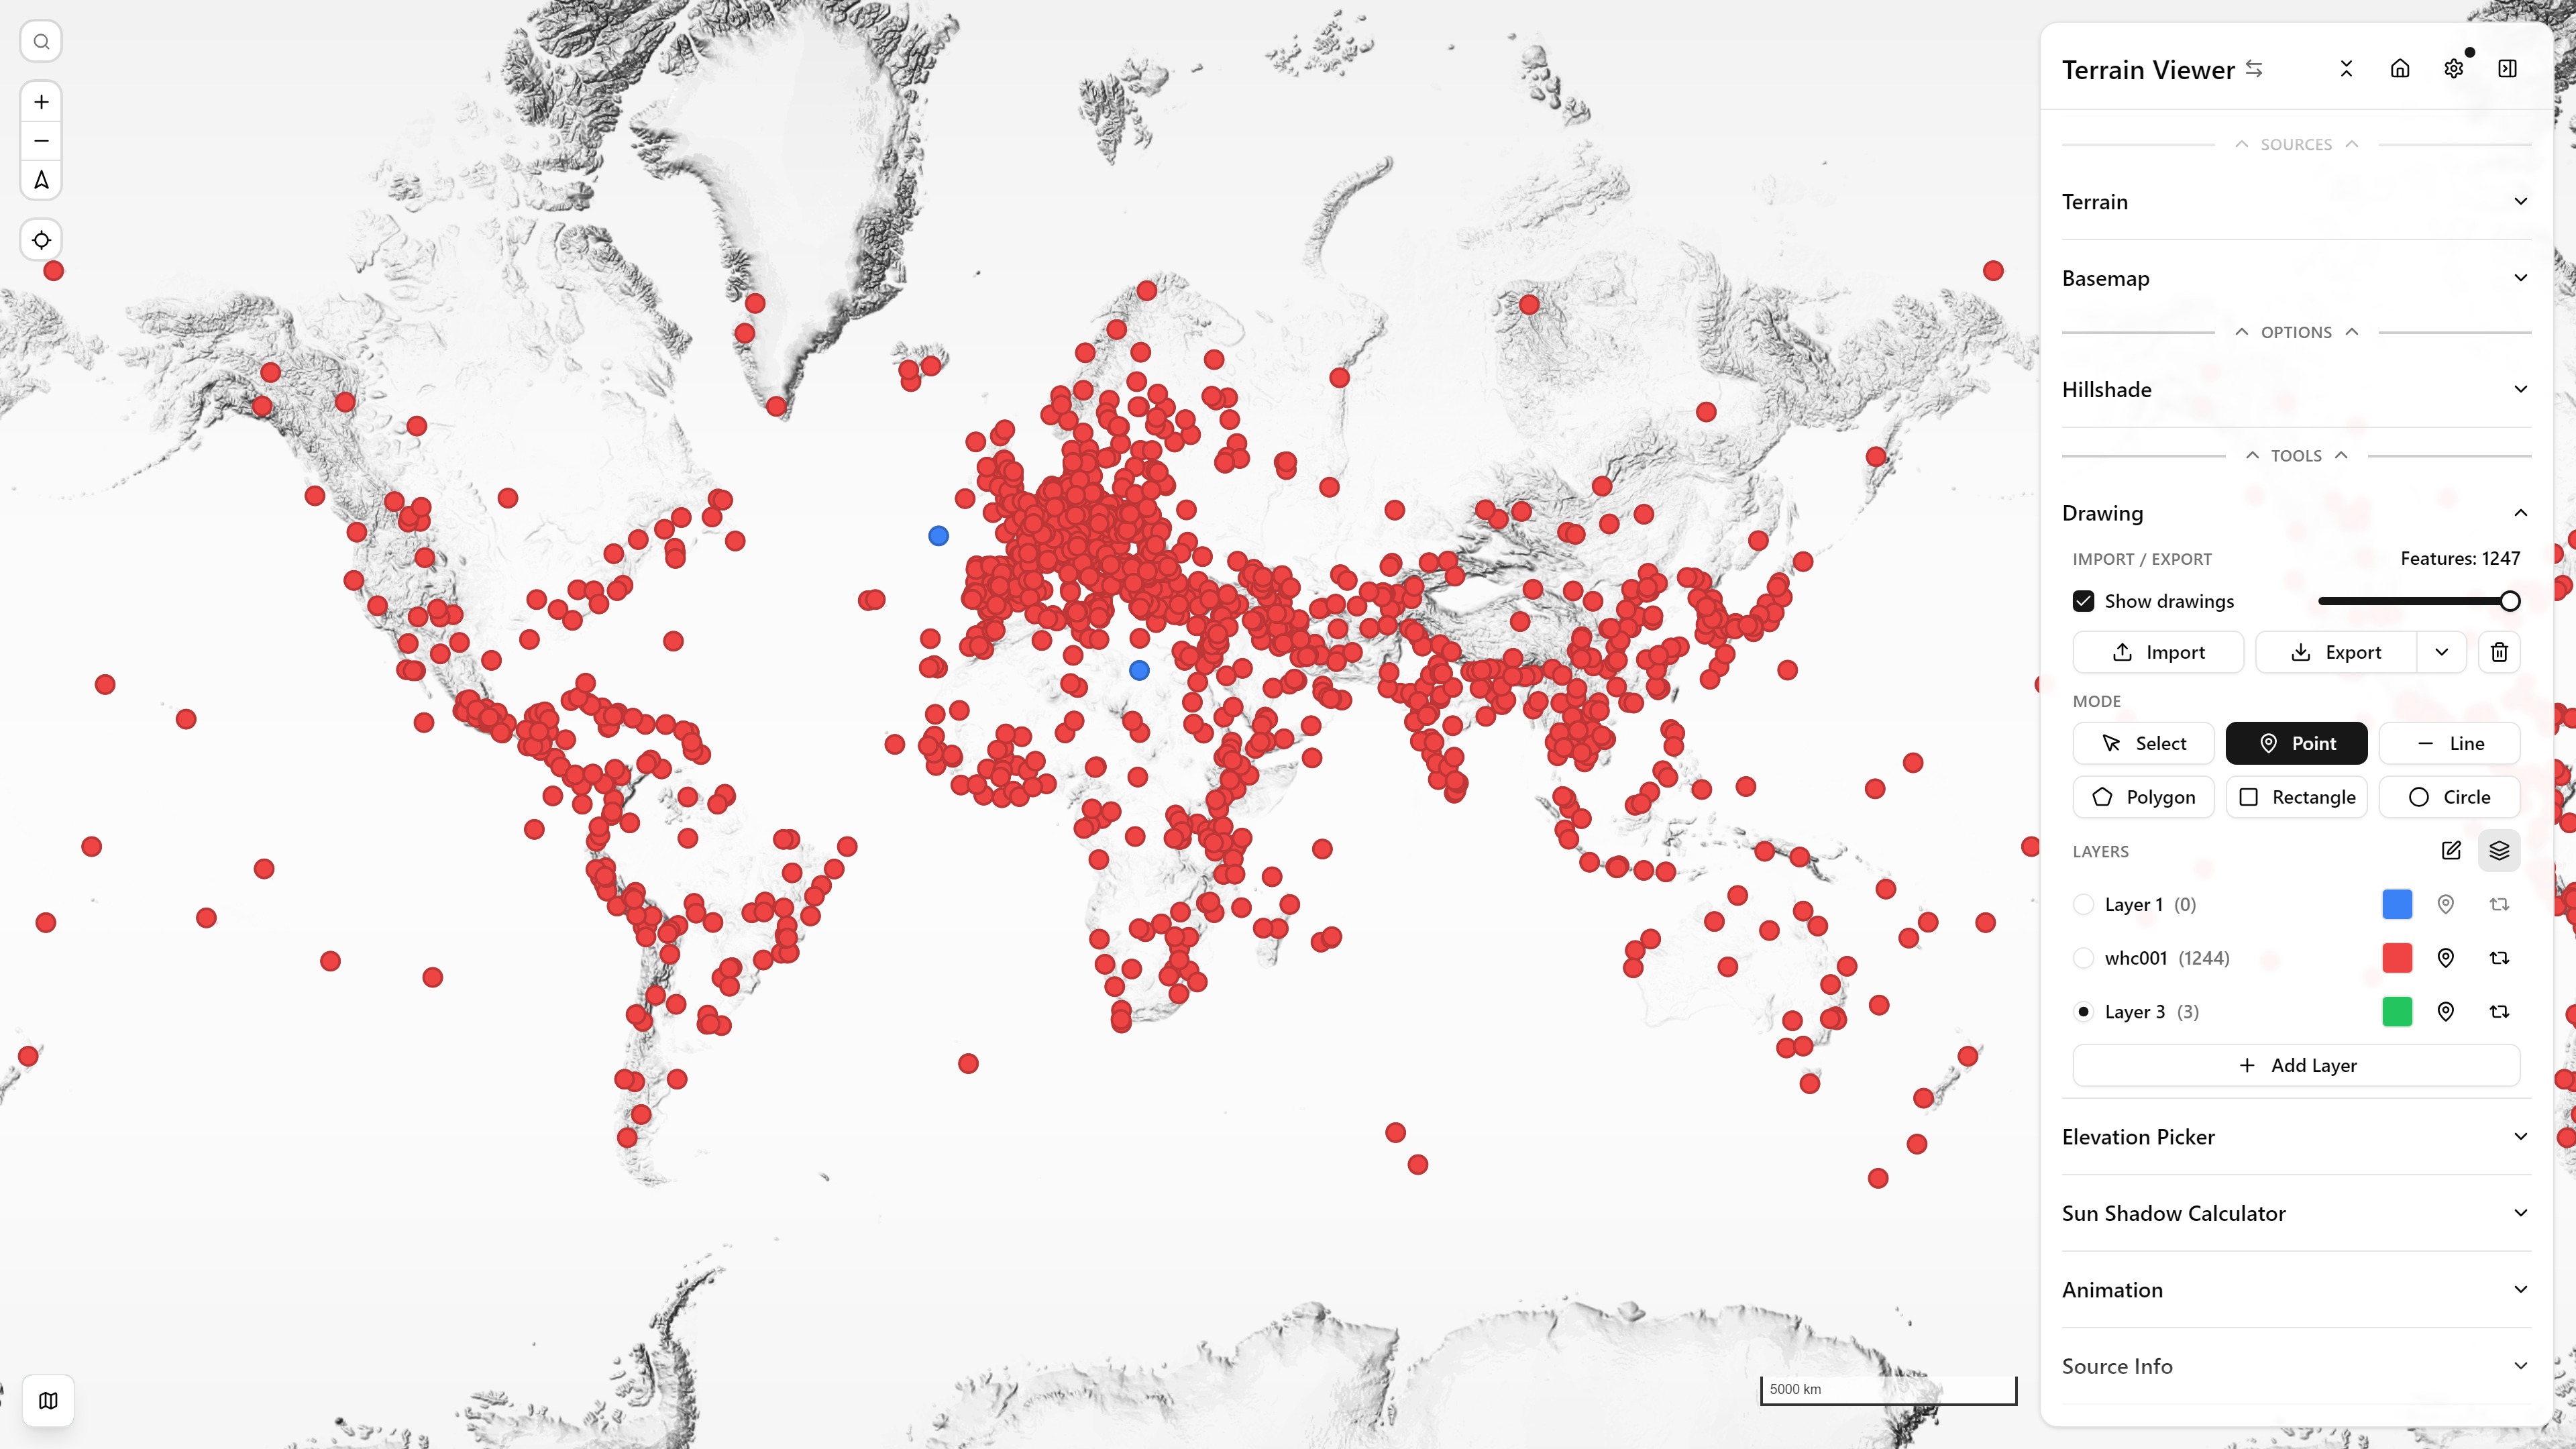
Drawing — an imported GeoJSON layer (world heritage site boundaries) alongside a second, hand-drawn point layer
Elevation Picker
Click anywhere on the terrain to read off its elevation, sourced from the same active DEM driving the rest of the app (Mapterhorn, Mapbox, MapTiler, AWS, or a custom BYOD source) — useful for a quick spot-check without switching on Elevation Hypso or exporting a GeoTIFF. Several distinct modes live under this one toggle:
- Single-point altitude — one click samples the elevation right there.
- Altitude delta — a second click measures the straight-line distance and elevation difference (Δ Elevation) against the first.
- Line profile / line of sight — switches to a full elevation profile chart sampled along the path between two points, plus a mast-height field for a simple line-of-sight check.
- Straight line vs. routed path — the profile can sample a direct great-circle line, or a real routed trail/road (BRouter or Valhalla, with a hiking/bike/vehicle profile) between the two points instead.
- Sample Reference: Absolute vs. LRM — sample real elevation, or height relative to the local neighborhood mean (same reference the Local Relief Model / Plane Slicer use).
- Plane Slicer — an elevation-threshold plane that paints the terrain above or below a chosen altitude (or LRM height), independent of the point/line picker above.
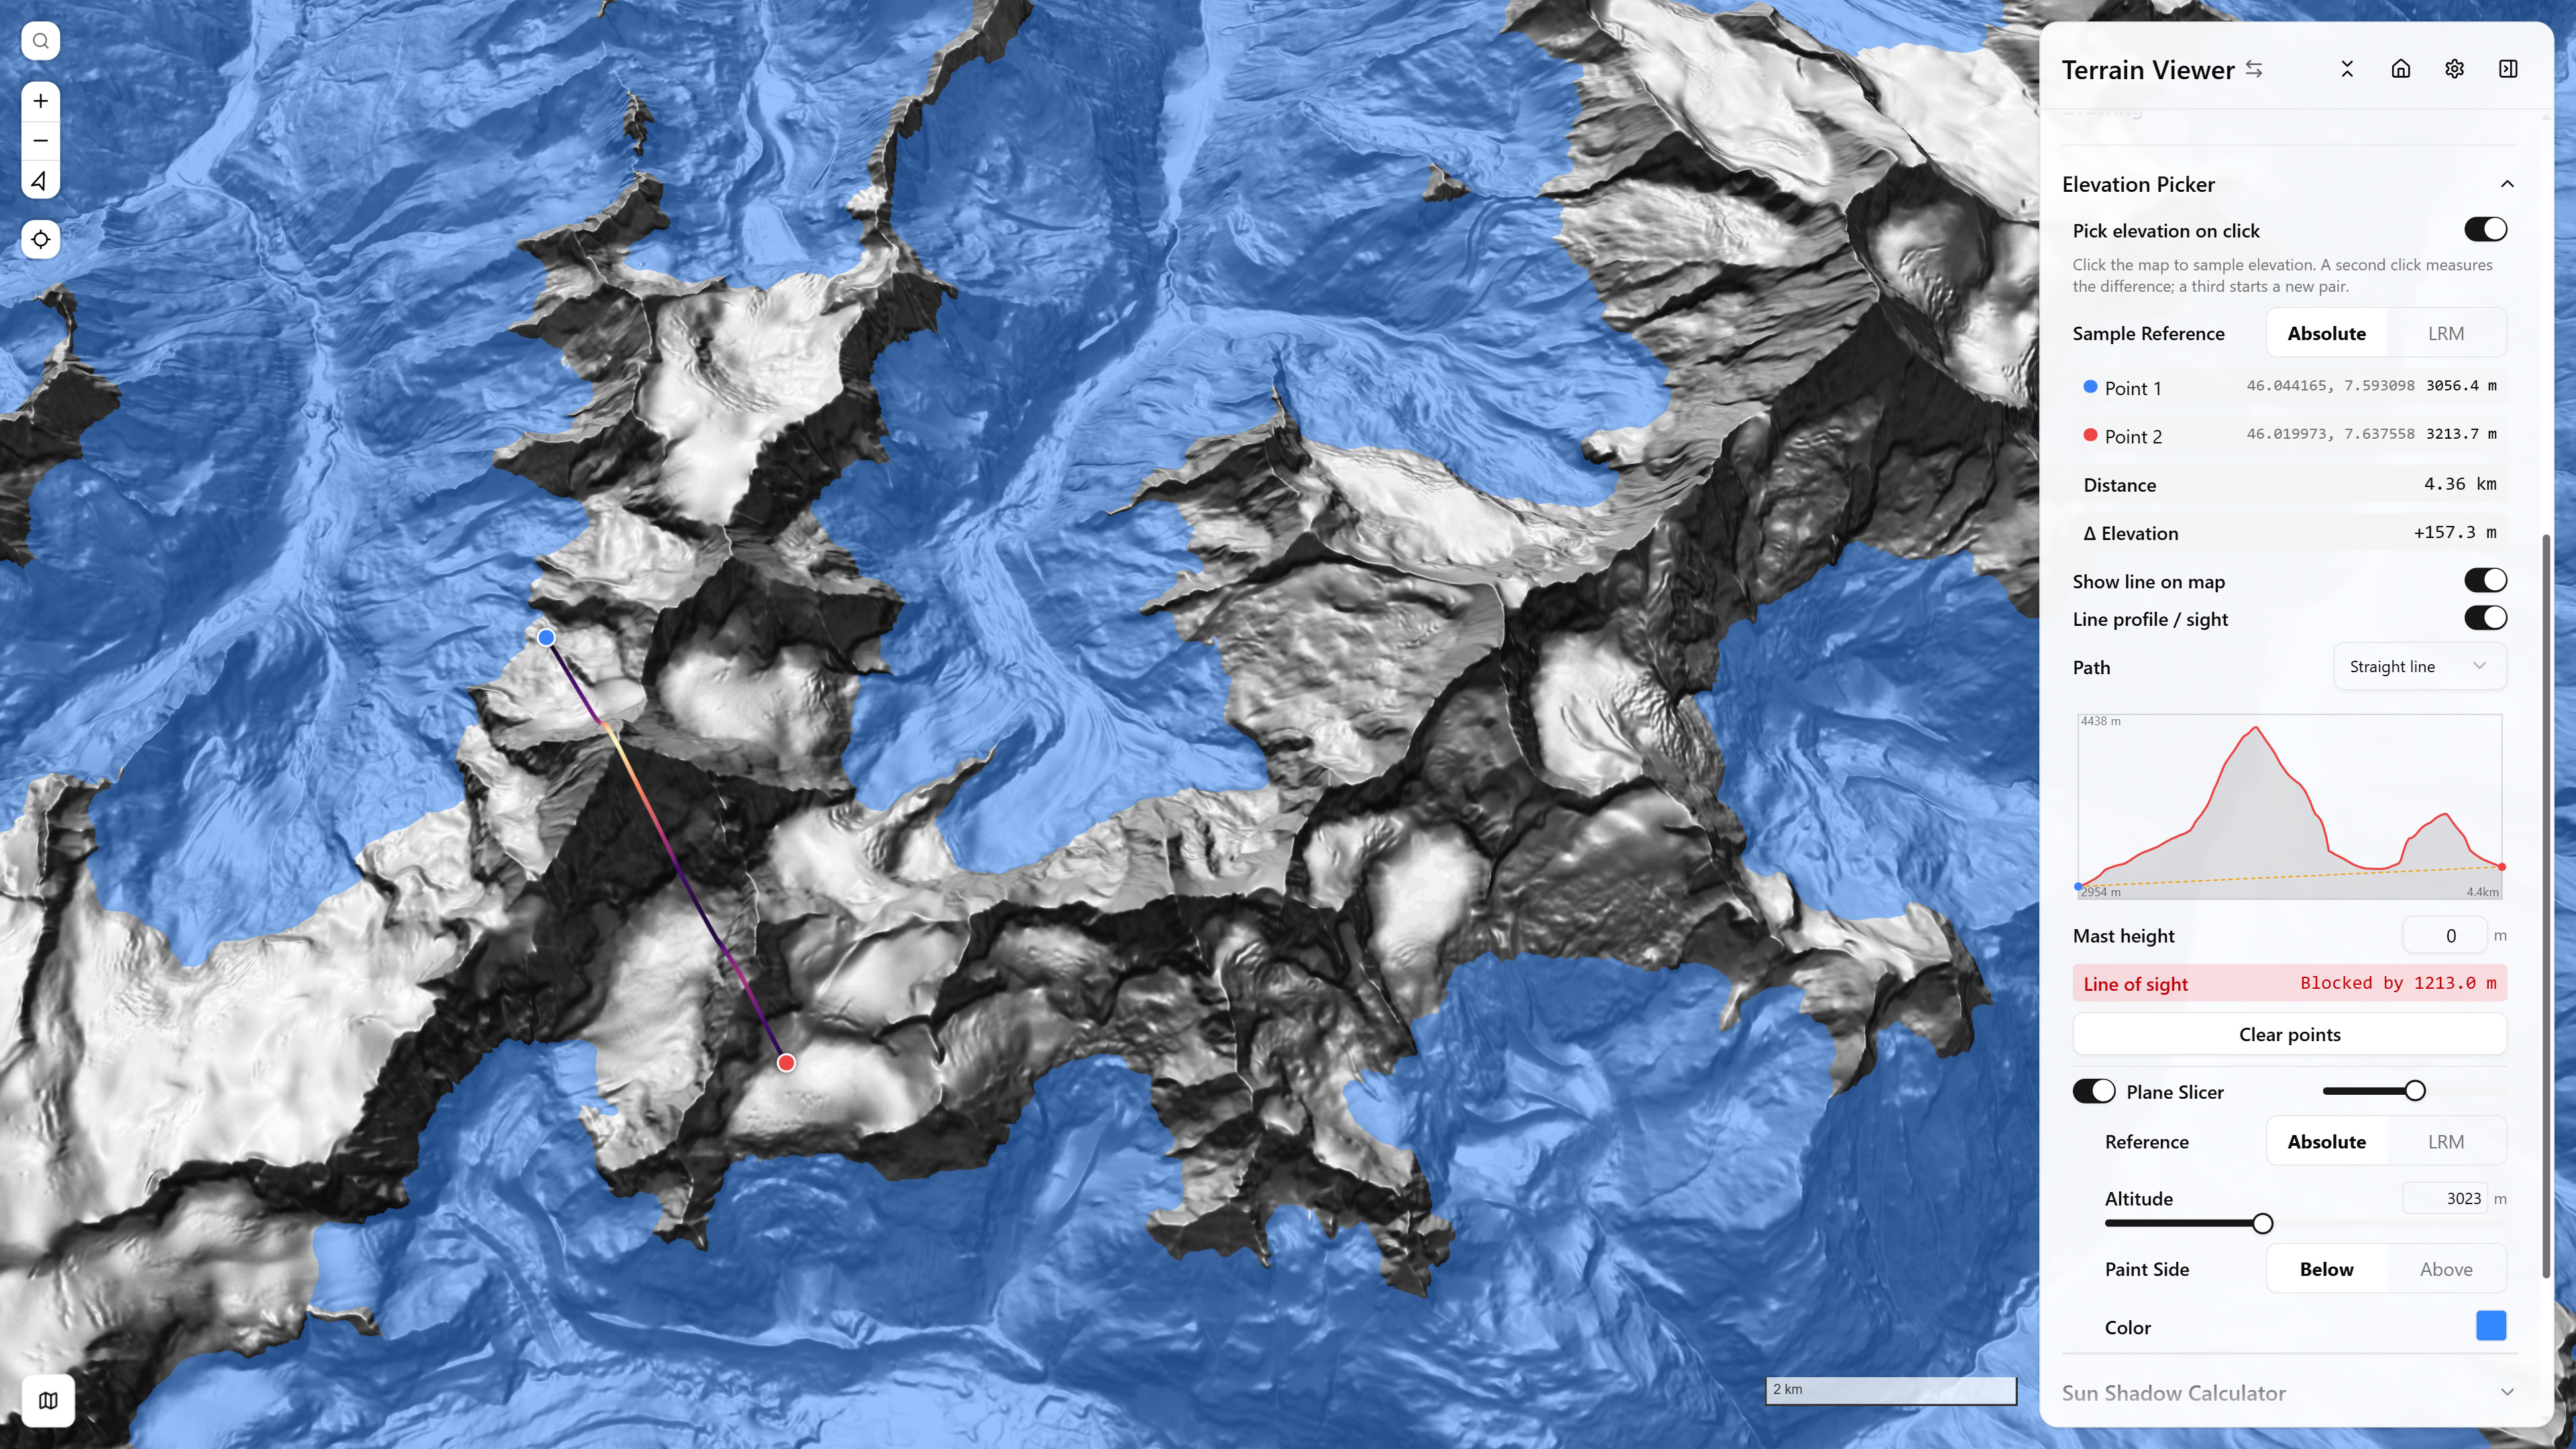
Elevation Picker — Line Profile (two points, color-graded by elevation) + Plane Slicer flood-fill — Matterhorn massif — open in app ↗ (camera/Plane Slicer state only — the two picked points aren't URL-reproducible, pick them on the map yourself)
Sun and Shadow Calculator
Beta — enable Sun Shadow Calculator under Settings → Beta.
The rest of the app points the light and shows you the shadow. This tool runs it backwards: give it a shadow and it tells you the time.
Click the base of something whose height you know — a tower, a pole, a building corner — then click the tip of its shadow, and type the height. Those three numbers fully determine a light direction: the azimuth comes from the base→tip bearing, reversed (light arrives from the opposite side of the shadow), and the elevation angle from the height-to-length ratio. inverseSunPosition then back-solves that direction to a day of year and a time of day, corrected to local time for the clicked location.
Two directions of use:
- Forward — pick a point and a date/time, and see where its shadow falls.
- Reverse — pick base, tip and height, and read off when the photograph was taken.
The answer is written into the same shared light fields the Sun Position control uses (illuminationDir, illuminationAlt, lightDayOfYear, lightTimeOfDay), so Hillshade, Phong and cast Shadows all snap to the solved light at once. It is not a separate lighting model — it is another way of setting the one light.
A solar azimuth/elevation pair does not map to a single instant: the same sun position recurs twice a year, and the day/time pair the solver returns is one of a small family. Use it to narrow a season and an hour, not to timestamp to the minute.
Animation
Fly the camera along a scripted path through the scene — set keyframe camera poses and interpolate between them, exportable as a rendered fly-through. Available in Terrain mode; Historical mode's own Tools group drops it since there's no single continuous elevation surface to fly a smooth camera path over.
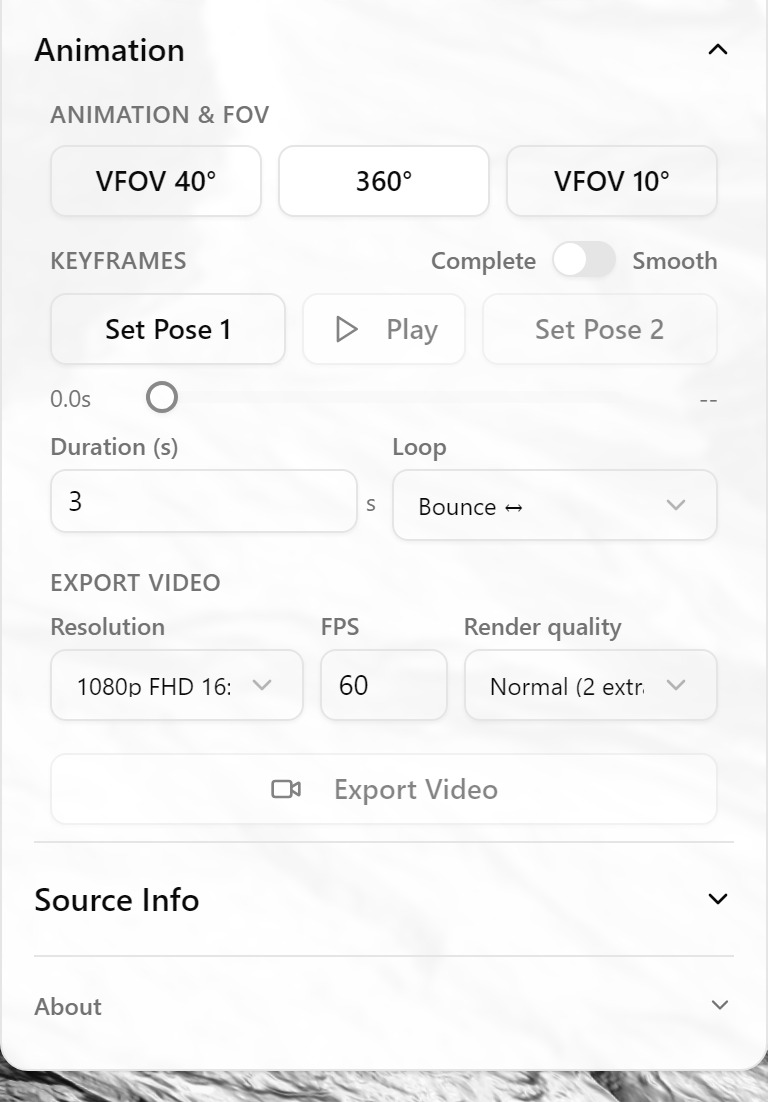
Animation — panel only
STAC search
Beta — enable STAC catalog search under Settings → Beta. A tab in both the Add Terrain and Add Basemap dialogs.
STAC is the standard index for cloud-native imagery and elevation. This tab searches a catalog for scenes over your current view and adds the COG assets it finds as sources, with no download step.
Seventeen presets ship, grouped by what they hold:
| Group | Catalogs |
|---|---|
| Mixed | OpenAerialMap, Earth Search (AWS/Element 84), eoAPI demo, NASA VEDA, swisstopo |
| Imagery | LINZ New Zealand, Maxar and Vantor open-data disaster events, Planet disaster releases, Umbra and Capella open SAR, Lower Saxony orthophotos, SPOT Canada |
| Elevation | OpenTopography raster DEMs, LINZ elevation, Polar Geospatial Center (ArcticDEM, REMA, EarthDEM) |
| Registries | federated collection discovery (MAAP) |
Or paste any catalog URL: a .json is crawled as a static catalog, anything else is treated as a STAC API.
The same list is also in the Library, under Catalogs — a catalog cannot be "added" the way a single dataset URL can, so its row offers Browse, which closes the Library and opens this tab with that endpoint already selected. That is the entry point worth remembering: the Library is where you look for data, and per-scene DEMs (EarthDEM strips, ArcticDEM strips, OpenTopography's rasters) only exist behind a search.
Each catalog row also has a +/−, which decides whether that endpoint is offered in the search's own picker at all — so a list you never use can be trimmed to the handful you do. The choice is remembered, and it is stored as the exclusions, so a catalog added in a later release turns up rather than being silently absent.
What the panel does for you:
- Two access shapes, one UI. A STAC API is paged through its
/searchendpoint with bbox and datetime; a static catalog has no search, so its child links are crawled breadth-first and filtered to the view. Static crawls of deeply nested archives (Umbra's year-nested tree, for instance) are slow by nature — the progress line says where it is. - Filters — date range, current view only, cloud cover.
- Web Mercator first. Assets already in EPSG:3857 sort ahead of the rest, because they load directly; anything else is pinned to titiler automatically rather than failing quietly.
- Terrain is filtered to single-band elevation rasters, so the terrain dialog does not offer you an RGB quicklook as a DEM.
- Collections offering a
xyzweb-map-link can be added as a tile source directly, without picking an item at all.
Your last catalog, collection and filters are remembered per target, so reopening the tab resumes where you left off.
A catalog has to send CORS headers to be usable from a browser at all, regardless of how open its licence is. CNES GEODES, for example, answers 200 with 66 collections and no Access-Control-Allow-Origin — unreachable from any client-side app.
Basemap catalog search
Two more tabs in the Add Basemap dialog, for imagery rather than elevation.
NextGIS QMS — searches qms.nextgis.com, a community index of public map services. Only tms and wms entries can become a MapLibre raster source directly, so those are what the list shows; each result carries its zoom range and a permalink into the QMS browser.
OSM Editor Layer Index — the imagery catalog behind iD, JOSM and Rapid: roughly 1,500 aerial, map and historic sources, most of them national or regional agency services with their licence recorded. It ships bundled (bumped weekly) rather than fetched, so it works offline and cannot break when an upstream index moves.
- Filter by text, by category (aerial, map, historic map, OSM-based, historic aerial, QA, elevation), or to layers covering the current view.
- "Best" layers are starred, as the OSM editors mark them.
- Licence and attribution follow the layer into Source Info, along with a permalink to the index entry.
- An entry's real coverage polygon — not a bounding box — can be drawn as a coverage overlay.
An index entry declares whether it is a basemap or an overlay, and that role is honoured on add: an overlay-role layer joins the overlay list rather than silently replacing your basemap.
nDSM and Comparison (DSM − DTM, change detection)
A terrain source made from two others, subtracted tile by tile — normalised surface models (nDSM, canopy height), and elevation change between two surveys — with the caveats on references and datums
Export & Share
Snapshots, DEM GeoTIFF and contour exports, historical batch export, and social sharing